
1)Building the Wildcat
I chose the Tamiya Wildcat over a Zero because removing the glazing from the canopy would be easier because there was less of it. I wanted to remove the canopy so that it wouldn't cause reflections or interfere in other ways with the green screen.
I used a tiny drill and an acorn cutter in a motor tool to remove the glazing. It was actually much easier than I had expected.
Not much to say about the Tamiya kit. It's a beauty although I though the lack of options or a pilot was a bit weak. Fortunately I was able to bodge the undercarriage in the retracted position and borrow a pilot from another model.
I cut open a few panels as well as removing some flying surfaces to make the plane look destroyed, this plane flies on supernatural power!
I added a 2 sockets from square section brass, on the rear and underneath to allow insertion of a brass tube handle to fly the puppet and there are also holes drilled in the wingtips and tail to allow for suspension. These 3 options should allow me to film the model against the green screen in a variety of orientations.
2) Painting the Wildcat
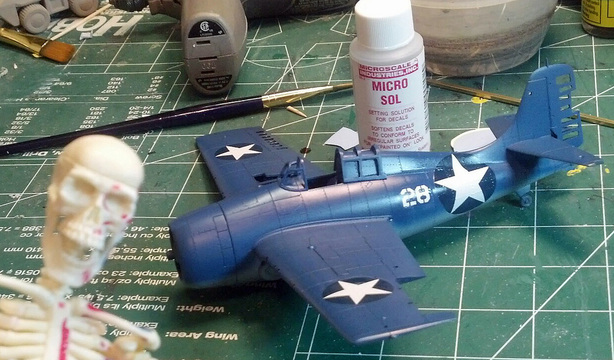
Skeleton photo bomb!
This shot shows the wildcat before weathering. A basic 2 tone scheme.
The decals are applied with Micro Sol which dissolves them and blends them into the models surface.
You can see in these images that the canopy glass has been removed to minimize problems with green screen.
The skeleton is going to be the pilot. Making him goggles is going to be fun!
3)Weathering the Wildcat!

I wanted the plane to look like it had been flying around hell for the last 60 years, but it was important not to use green. Basic two tone blue paint job with sponge paint chips and airbrushed shading on the panels.
Right now it has another gloss coat on it and I will apply panel line washes and detail painting tomorrow.
Right now it has another gloss coat on it and I will apply panel line washes and detail painting tomorrow.
4)Building the Pilot

The pilot is a 1:48 Tamiya Zero pilot with the face from the Citadel skeleton and green stuff goggles. In this pic the larger skeleton I was working on is also shown. I'm abandoning that model for a 1:6 scale doll with a replacement skull head. It will look better and being the same scale as the hornet pilot doll I already have the animation should match.
Just need to paint this little pilot and then hit the whole plane with flat varnish to dull it down.
Just need to paint this little pilot and then hit the whole plane with flat varnish to dull it down.