
Flying Swallow Build Up
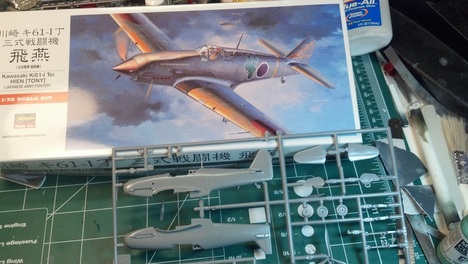
The Hein is built from the Hasegawa kit. Its 1/72 scale so its not very big and the parts count is low. The fit and quality of the moldings is as good as you could possibly hope for.
Stage1: Parts Clean Up
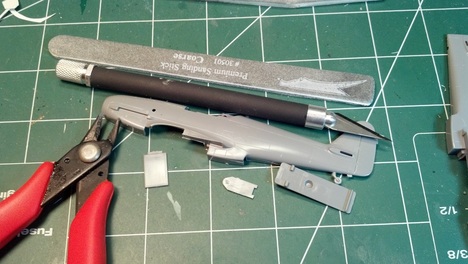
Carefully cut the parts off the trees.
Remove the sprue attachment points carefully with clippers, a knife and sanding boards. Also look for any molding defects that may interfere with the joining of parts.
Remember: Measure twice, cut once. There is no undo button on an exacto knife!
Exacto knife blades are cheap. On an average model I will probably go through at least 4 blades. A sharp blade needs less pressure to cut with and so is safer and will also yield a neater, cleaner cut.
Stage2: Glue the Parts
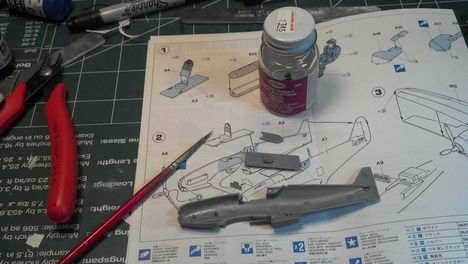
To glue the parts use a plastic solvent. This is a clear liquid that dissolves styrene on contact.
Often this comes with a brush in the bottle which is way too big for our needs.
Use a small detail brush as you do not want to apply very much glue.
Be very careful with the solvent. Its quite volatile and you really don't want to spill it on anything plastic as it will melt it.
To glue the parts, simply hold them together and then run a drop of the solvent in the seam. Capillary action will suck glue into the seam. The solvent melts the plastic and then evaporates welding the parts together.
Stage3: Fix those Seams
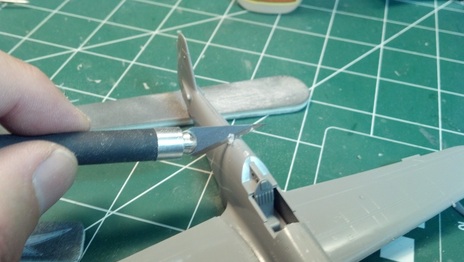
With a great fitting model like this one there will only be minimal seam clean up needed. You can scrape the seams with a knife as shown in the picture as well as using emery boards and fine sandpaper. Try not to alter the profile of the parts by creating flat spots.
If the tools are dragging, the glue isn't dry. Stop and wait a while.
Note in this picture we have some nasty gaps and steps between the fuselage and the wing. This is typical for WW2 fighter kits and we will address them in the next stage.
If the tools are dragging, the glue isn't dry. Stop and wait a while.
Note in this picture we have some nasty gaps and steps between the fuselage and the wing. This is typical for WW2 fighter kits and we will address them in the next stage.
Stage4: Sling some Putty
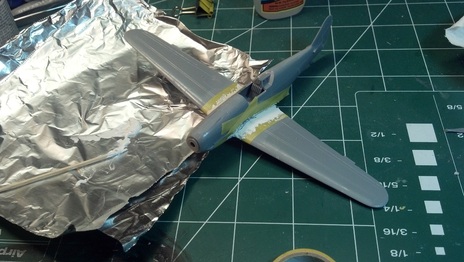
Here we've added some putty to the offending areas around the wing roots. Note that we used masking tape to protect the model outside of the seam areas.
We applied the filler by first putting some down on a piece of tin foil and then applying it with a cocktail stick. This gives more precision than applying straight from the tube. The putting being used here is a Tamiya product, but Bondo spot putty works fine too. Both of these dry quite quickly but shouldn't be used in applications more than a couple of mm thick.
For thicker applications ,a 2 part catalysed putty used for car body repair can be used.
Stage4: Clean Up
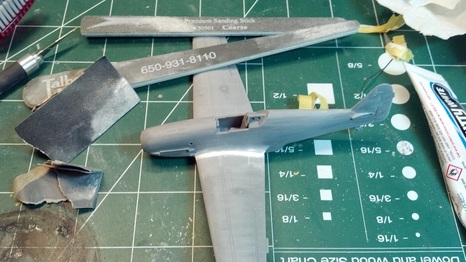
Here we are just about done with seam clean up on the wings. You can see some of the tools used. Small pieces of wet and dry sandpaper in 200 and 400 grit are great for working on curved surfaces.
At this point we've also gently sanded the entire airframe because this will give the surface some tooth for the paint to stick to.
At this point we've also gently sanded the entire airframe because this will give the surface some tooth for the paint to stick to.
Stage5: Transparent Parts
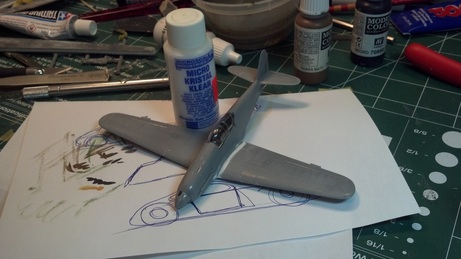
We've painted the interior including a pilot and then attached the canopy using Microscale Kristal Klear which is basically a thick PVA glue. Its a great product for attaching clear components, but it does take a while to dry. Leave the parts for several hours at least even if they do feel like they are firmly attached.
Stage6: Canopy Masking
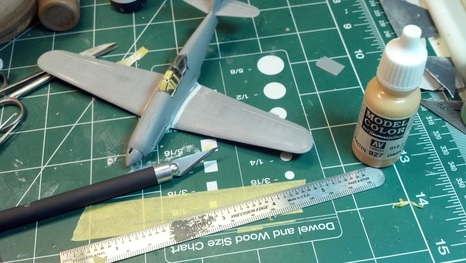
We need to mask the canopy before painting. We do this by cutting thin strips of Tamiya masking tape an applying them using tweezers and a sharp knife. This is definitely one of those times where a new blade is essential.
This is a time consuming fiddly process so approach it with a zen attitude.
This is a time consuming fiddly process so approach it with a zen attitude.
Stage7: Paint
We sprayed the entire aircraft a dark shade of grey as a primer. This also makes the interior of the canopy framing a nice dark color. Then we sprayed the plane with a light grey. Then the antiglare panel was masked off and sprayed with dark grey.
The red trim was painted by hand.
For spraying we used Tamiya acrylics applied with a paasche vls. The trim was brush painted using Vallejo acrylics.
Generally we use lighter colors on smaller models to simulate atmospheric effects. This is why we used grey for the nose trip and not black.
Once the main colors are down and dry we gloss coat the model using future acrylic floor polish in preparation for the decals.
Stage 8: Decals and Weathering
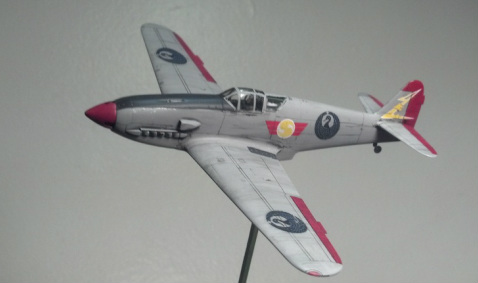
Waterslide decals are applied using a mix of custom printed samurai crests and kit decals. They are applied using water and then dissolved into the surface of the model using another Microscale product called MicroSol.
We'll have to go into more detail on another project about this process as we didn't take many pictures of this aspect of the build.
Next another coat of future is applied to protect the decals. Followed by some washes of thinned water colors to enhance the panel lines. These washes are not waterproof and so can be manipulated with a cotton bud to indicate streaking the direction of air flow.
The final step is a coat of semi gloss varnish. Remove the canopy masking and detail paint any small parts such as the exhausts and the tail wheel.
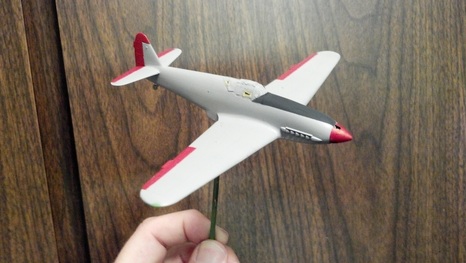
Stage 9: Admire your Handy Work :-)

This is always the part where you which you'd taken more time and done things better, but then there is always the next project. Practice makes perfect, or at least better.
The most important tool for model building apart from experience has to be patience. I generally find myself building models in the background while I'm doing something else. If building a model is my primary focus, I tend to rush through stages and wind up with thumb prints and the like. With this model I rushed the canopy masking stage and moved the canopy around because the glue wasn't dry. Next time I will wait longer for the glue to dry.
The most important tool for model building apart from experience has to be patience. I generally find myself building models in the background while I'm doing something else. If building a model is my primary focus, I tend to rush through stages and wind up with thumb prints and the like. With this model I rushed the canopy masking stage and moved the canopy around because the glue wasn't dry. Next time I will wait longer for the glue to dry.